Making Character Sprites
Preface
This tutorial will explain how to make new character sprites for Astonia 3 and 3.5. I will be using DAZ3D but most of the instructions will work with any 3D rendering software.
Installation
Download DAZ Studio and install it. This will also install the DAZ Installation Manager. Run it, and install Genesis 8 Male Essentials. Then run DAZ Studio.
Setup
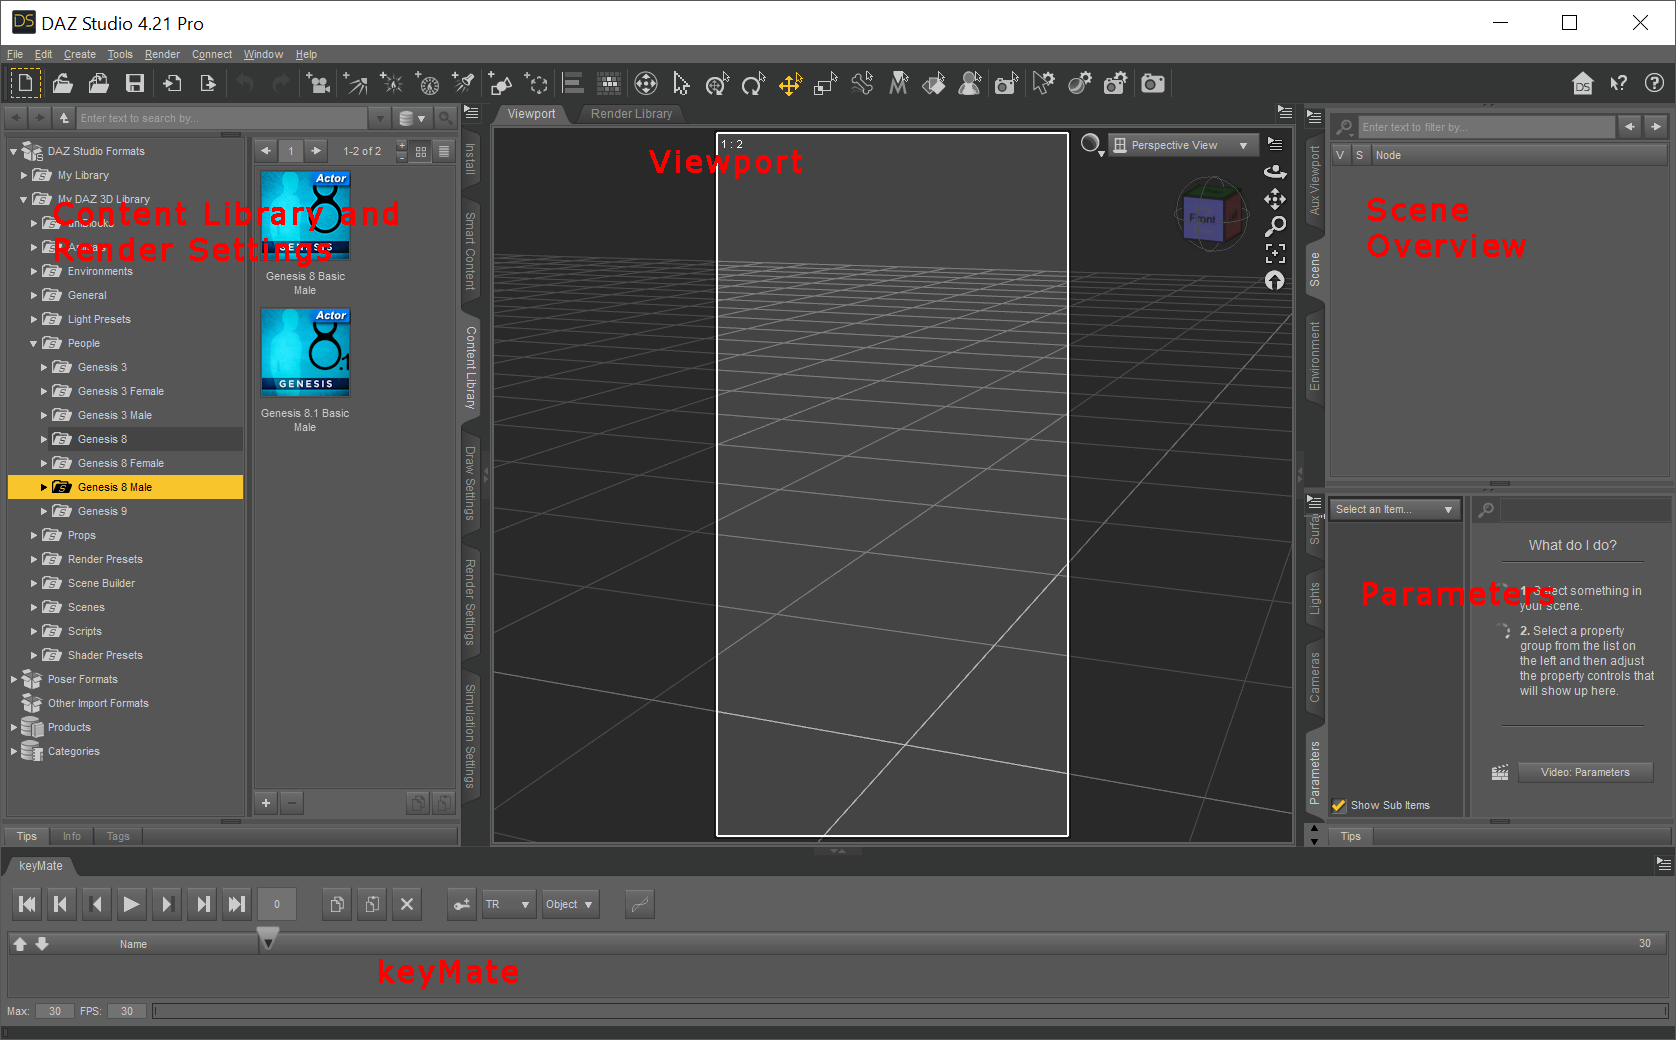
My setup looks like this. I don't know if this is the standard or if I changed it. Please try to get something similar, or at least learn how to open the Content Library, Render Settings and keyMate. You will also need the Scene overview and Parameters.
It seems that keyMate is no longer available. Please try using the Timeline instead.I will update the tutorial for it soonish.
Lights and Camera
Create a Distant Light by going to Create in the menu on top, then click on Distant Light. Once created it
should show up in your Scene Overview. Select it there and the Parameters should show up:
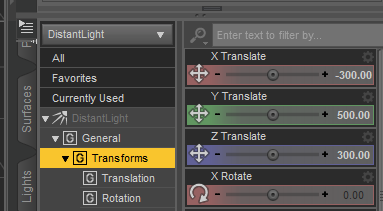
Set the Translate values as shown above. Then click on Light to the left and change Luminous Flux to 66000. Fine-tune this as needed. You could also add more lights, for less sharp shadows and overall better results. But this will give you the correct in-game lighting.
Create a Camera and set the Parameters like this:
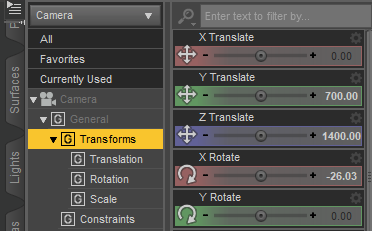
This gives you the correct viewing angle and the distance, along with the standard camera settings, makes characters just the right size. Possibly a little on the small side, so you might want to move the camera slightly closer.
Finally, create a Null. A Null is not visible in the scene, but it can be used to transform (in our case,
rotate) its children easily. It also makes it easy to change the pivot point. I name the Null charcenter.
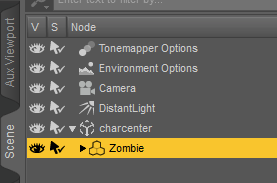
Your Scene Overview should look like this now:
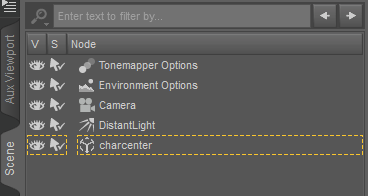
Update: The Distant Light's "Point At" has to be set to the Null charcenter!
Render Settings
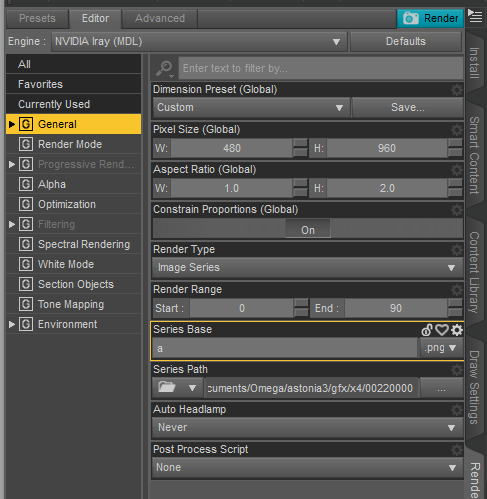
Open Render Settings to the left and open the General tab:
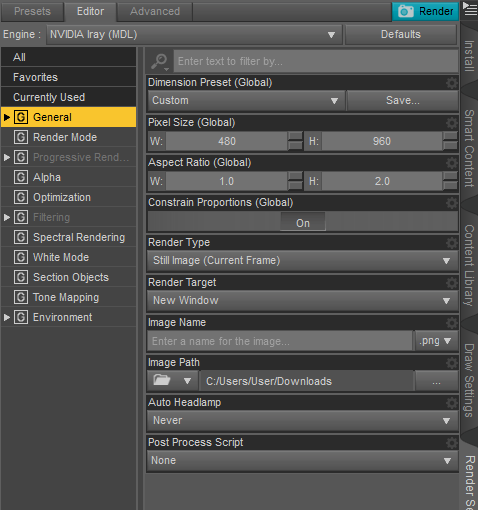
Set the Pixel Size to 480x960. The Viewport should display a tall rectangle with a 1:2 in the corner now.
480x960 is the size for a high resolution character for 4K (2160p) displays. I call them 4X. You can create the smaller versions 2X for 2K (1080p) and 1X for the original resolution by down-scaling the rendered images.
Or, you can decide to only create a lower resolution character and go for 240x480 for 2X or for the original 120x240. But I recommend creating the 4X sprites. It does not take that much extra rendering time and it looks so much better.
Character
Finally, open the Content Library and find the Genesis 8 Male. Double-click on the icon to add it to
the scene:

It will show up in the Viewport and the Scene Overview. Feel free to customize it. You should at least add some pants...
Finally, drag the character onto the Null (I called it charcenter) in the Scene Overview:
It will become a child node of the Null. And that's it, preparations are all done.
Posing and Animating
Basics
First, create the resting pose. It is used whenever the character is idle in-game. I will not explain
how to do that. It is a very complex topic, and it is explained elsewhere (check Youtube for tutorials,
for example):
For living characters, the pose should be more natural, of course.
Now take a look at keyMate:

You'll notice that it contains a list of all items in the scene, along with some controls and a bunch of
squares to the right. These squares hold a single frame of the animation. DAZ Studio will interpolate between neighbouring frames that hold information about the same item.

Frames can be copied, pasted and deleted. You can also turn one into a keyframe.
Usually, if you position an arm (for example) in frame 1 and re-position it in frame 12, DAZ Studio will interpolate between frame 1 and 12, even if you position, say, a leg in frame 7. If you make a frame a keyframe however, all positions are frozen in that frame, in the position they have when you click the button.
So, just to be safe, make frame 0 a keyframe. It holds the resting pose of the character now.
Timeline
A character sprite in Astonia 3 needs a bunch of different animations:
| Frame | Animation | Sprite | Directions |
|---|---|---|---|
| 00 | Resting Pose | 0 | 8X |
| 01-08 | Walking | 8 | 8X |
| 09 | (resting) | - | - |
| 10-17 | Directed Magic | 232 | 8X |
| 18 | (resting) | - | - |
| 19-26 | Idle | 800 | 8X |
| 27 | (resting) | - | - |
| 28-35 | Use / Give | 72 | 4X |
| 36 | (resting) | - | - |
| 37-44 | Take / Drop | 104 | 4X |
| 45 | (resting) | - | - |
| 46-53 | Attack 1 | 136 | 4X |
| 54 | (resting) | - | - |
| 55-62 | Attack 2 | 168 | 4X |
| 63 | (resting) | - | - |
| 64-71 | Attack 3 | 200 | 4X |
| 72 | (resting) | - | - |
| 73-80 | Self Magic | 296 | 4X |
| 81 | (resting) | - | - |
| 82-89 | Die | 328 | 4X |
| 90 | (resting) | - | - |
The resting pose at frame 9,18,27,... is not used to create sprites for the game, but it is very
useful as a start- and end-point for the animations. We will make them now:
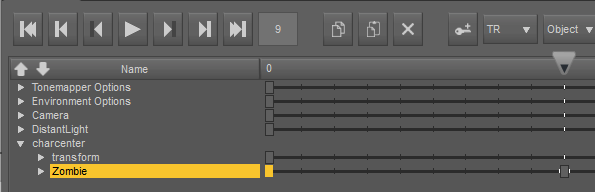
Click on the square to turn it yellow. It is in frame 0, next to the line saying Zombie (which will say Genesis Male for you if you did not rename the character). This is the resting pose of our character. Now move the slider on top to frame 9. Click on copy and then on paste. The square to the right should show up now. Repeat this for every multiple of 9 up to 90. You will have to increase the number of maximum frames in the bottom left.
Now, the most difficult part: Create the walking animation in the frames 1 to 8. Keep in mind that it needs to loop. The game will start over at frame 1 after showing frame 8. It will also be shown before and after the resting pose, so both frame 1 and frame 8 can transition to frame 0. Once again, consult other tutorials on how to pose and animate characters in DAZ3D.
The other animations are much easier. Directed Magic is used for fireball and lightning ball. It is usually some kind of pointing gesture. Idle is not strictly neccessary, but it is nice to have as it gives the character some life even when standing still. It needs a little extra code in sprite.c to make it show in-game.
Use / Give is for opening doors or handing items to other characters. Take / Drop is self- explanatory. The three attacks vary a lot between characters, from punches and kicks to sword attacks. Remember that they can start and end with the resting pose but will also be played after each other a lot. You might want to put the character into a fighting stance instead of the resting pose in-between.
Self Magic is used for heal (self), freeze, warcry and bless. Die, finally, is the character falling to the ground. The last frame of the die animation is the corpse that stays behind. Make sure it is suitable.
Animation Hints
You can move frames by dragging them.
You can select several frames at once by dragging a rectangle around them. This allows for mass moving.
Changing TR to TRSV allows you to animate morphs.
You can change the interpolation between frames with the right-most icon.
Save early and often, in different slots.
Rendering
When the animation are done it is time to render. Choose the camera view in the Viewport:
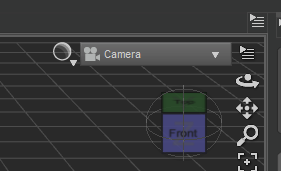
You will forget, and you will be sorry. Always check that the camera is chosen before rendering. And make
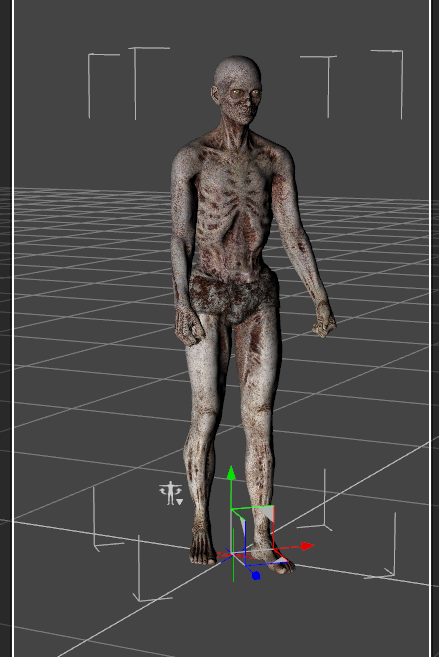
sure the camera settings are still correct. Then select the Null (I named it charcenter) in the Scene Overview
and set its Y Rotate to 45 degress. The character in the Viewport should look like this now:
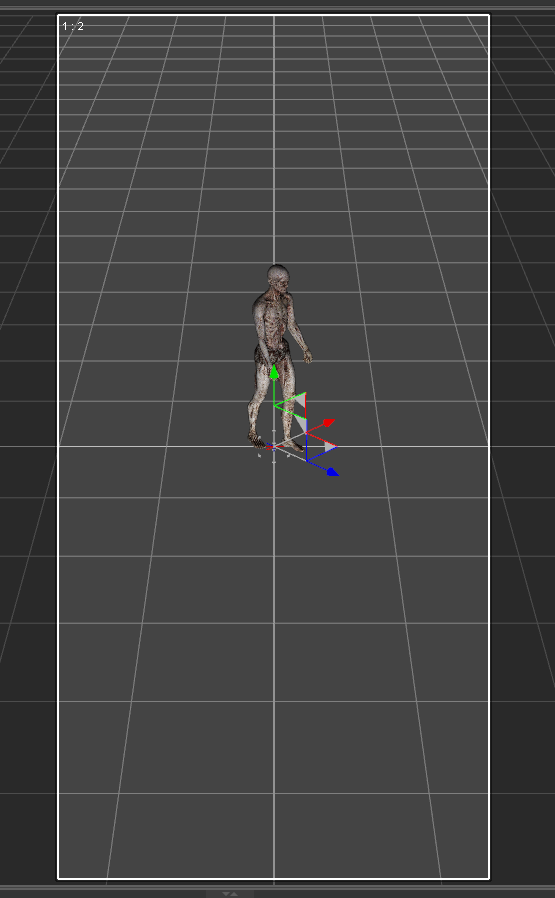
Its feet should be in the center of the tall rectangle. Then, go to Render Settings:
Do a few test renders by using Render Type Still Image.
Change Render Type to Series. The range should show as 0 to 90 automatically. Series Base is "a" (without the quotes). DAZ Studio will automatically append numbers and turn it into a00.png ... a90.png. Set the Series Path to something that works for you. And, finally, click on Render. It will take a while.
In the meantime, you can use anicopy.c to create a batch file that will rename the images as DAZ creates them into what the game needs. Or you can download this batch file for images starting at 00220000, which can be shown in-game as character sprite 120 (/ps 120).
Once the rendering is done, copy the batch file into the folder with the images and run it. It will show a lot of errors, that is fine. We have only rendered a single direction of our character. But you should check it out in-game to spot any errors before rendering all of it. Copy them into the appropriate directory in your client installation.
| Name | Angle | Frames |
|---|---|---|
| a | 45 | 90 |
| b | 0 | 26 |
| c | -45 | 90 |
| d | -90 | 26 |
| e | -135 | 90 |
| f | 180 | 26 |
| g | 135 | 90 |
| h | 90 | 26 |
Once you are satisfied with your animation, do the renders as listed in the table above. Change the name in the Render Settings and the angle in the Null (charcenter). You can stop early for every other direction because the game will never use those.
I know this part is tedious at the moment. I plan to create a script in DAZ Studio that will automate this part. Eventually. Any and all help welcome, of course!
When the renders are done (or, at any point during the process if you want to check on the results), run the batch file and check out the renders in the client.
Well, that's all folks. Comments and suggestions are welcome. If you could not follow the tutorial at any
specific point, I'd like to know!
daniel@brockhaus.org.